Top search terms
Home
/
EPEVER 40A MPPT Solar Charge Controller 12/24VDC Automatically Identifying System Voltage with MT52 Remote Meter &Temperature Sensor RTS &Communication Cable RS485
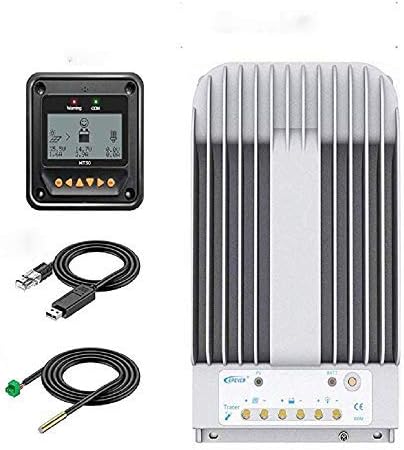
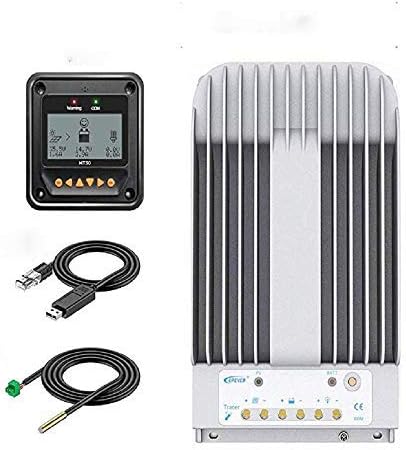
EPEVER 40A MPPT Solar Charge Controller 12/24VDC Automatically Identifying System Voltage with MT52 Remote Meter &Temperature Sensor RTS &Communication Cable RS485
Tracer-BN series based on common negative design and advanced MPPT control algorithm. Work with lithium and all lead acid batteries, sealed(AGM) GEL and flooded battery. User mode allows customers setting their own charging parameters.The controller can be used in many fields such as communication b
Quantity
-
Detail
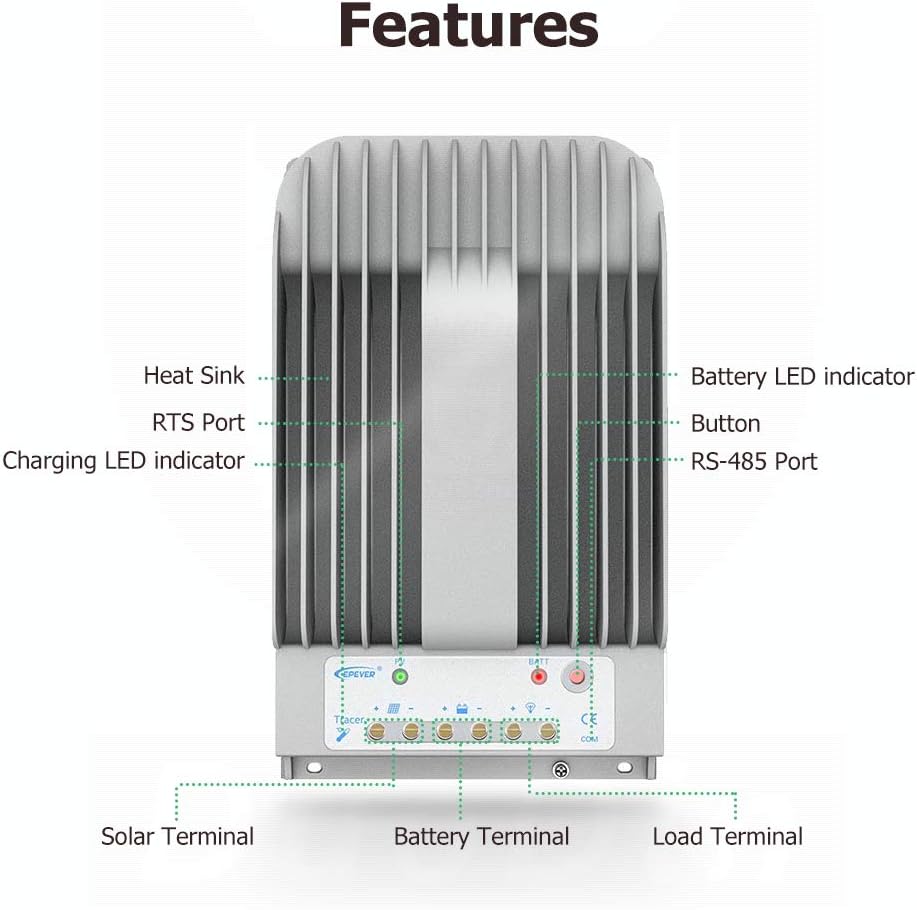
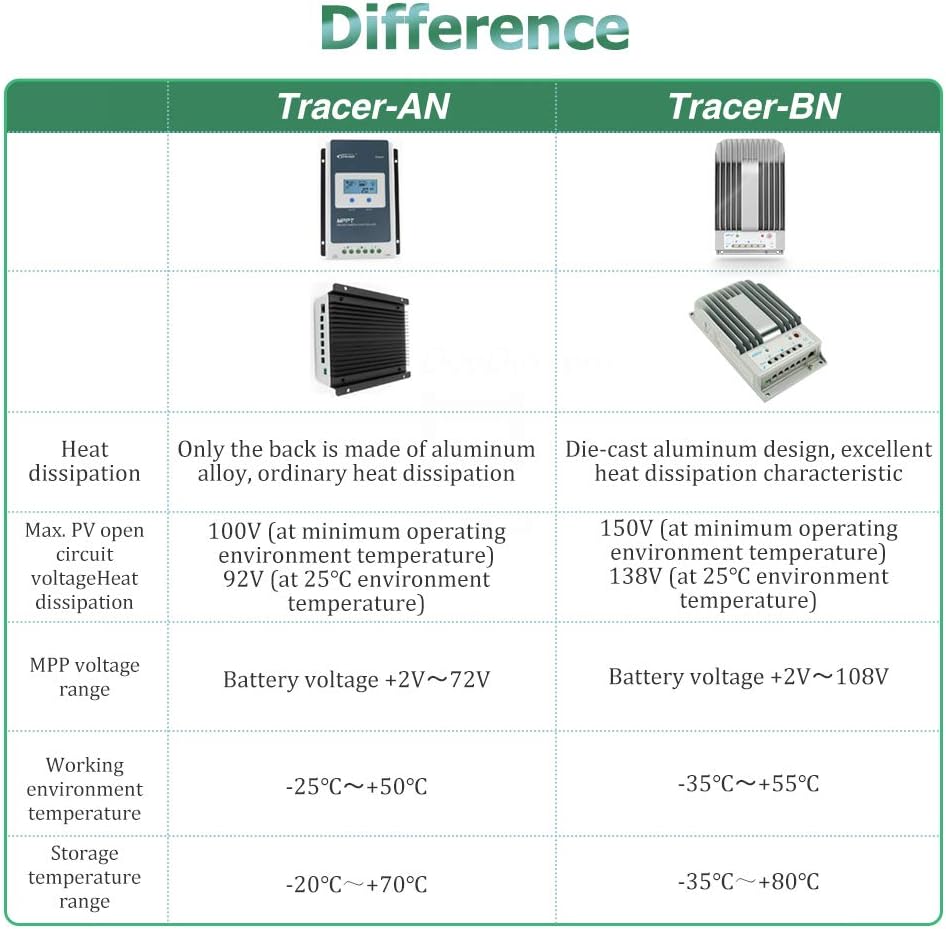
The Tracer-BN series is based on common negative design andadvanced MPPT control algorithm, with die-cast aluminum design for heatdissipation. With MPPT control algorithm, in any situation, products ofthis series can fast and accurately track out the best maximum powerpoint (MPP) of photovoltaic array, in order to obtain the maximum solarenergy in time, which remarkably improves energy efficiency.
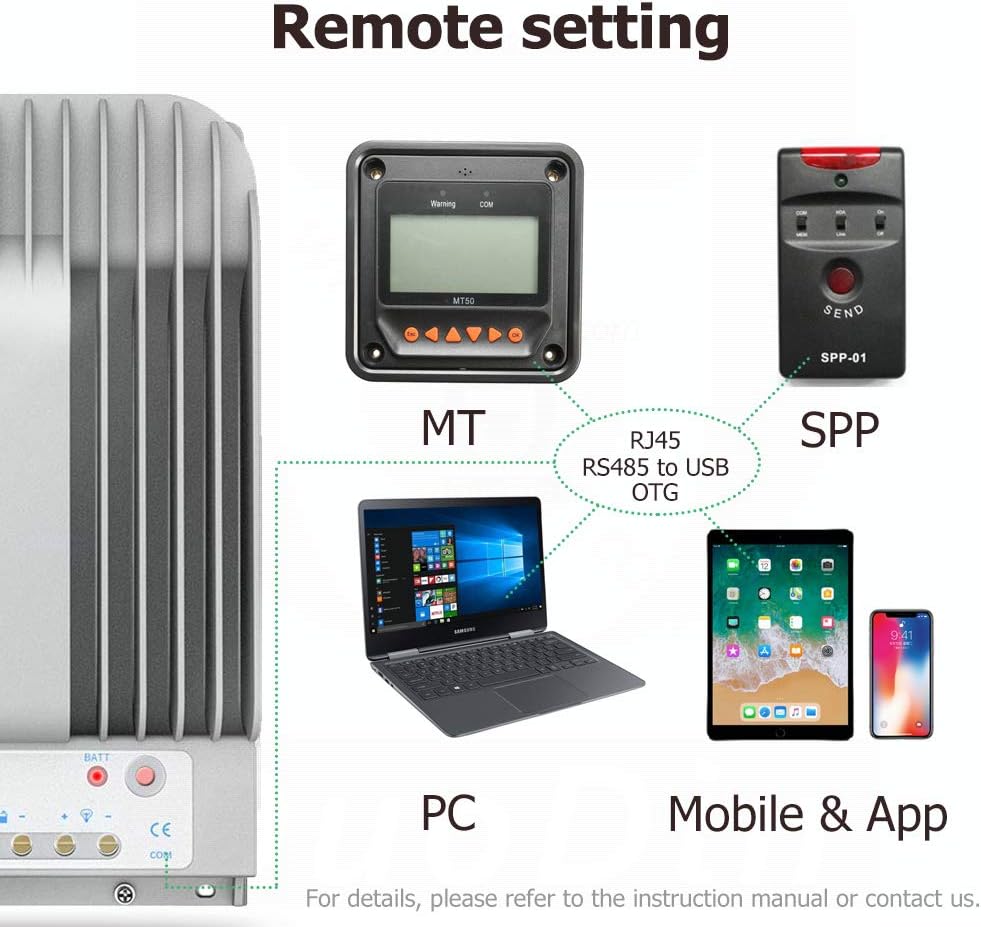
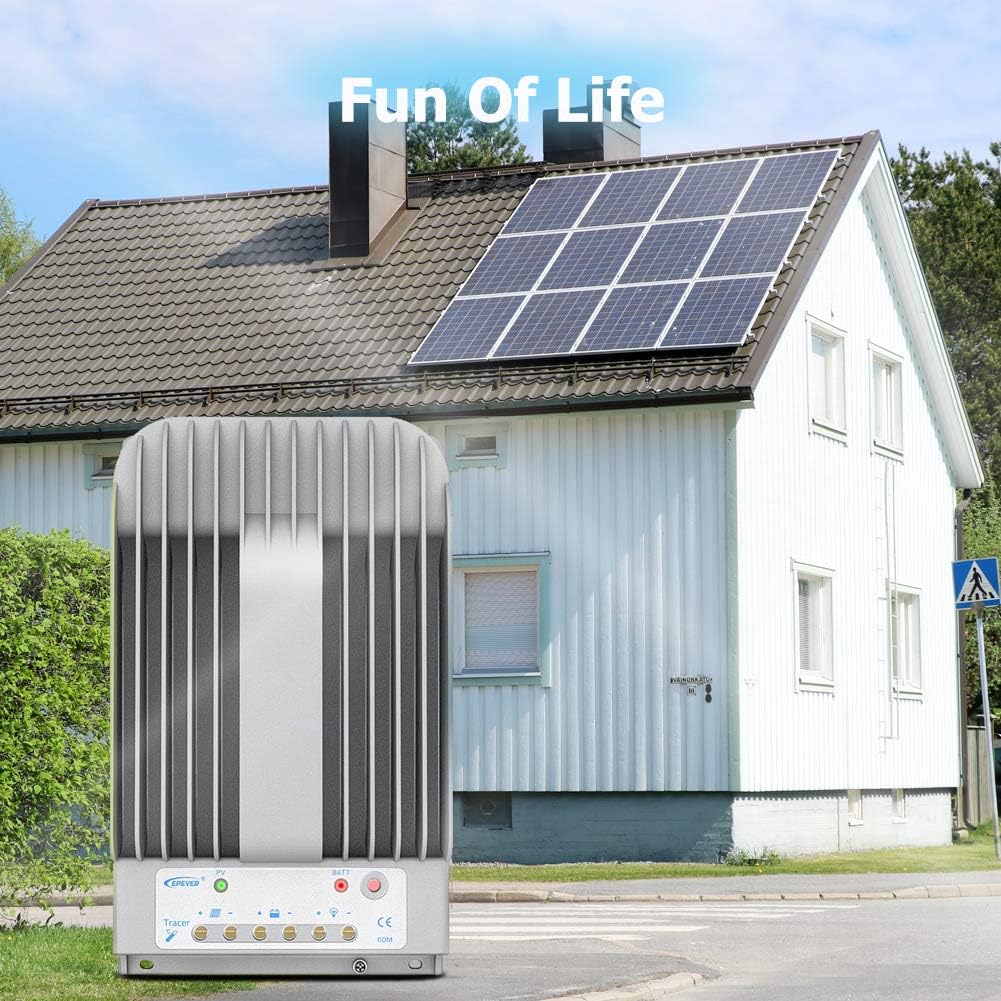
With Modbus communication protocol interface, it isconvenient for customers to expand applications and monitor in variousfields like telecommunication base station, household system, caravansystem, street lighting system, wilderness monitoring system, etc.
All-round electronic fault self-test function and enhancedelectronic protection function could furthest avoid damages on systemcomponents resulting from installation errors or system failures.
System voltage:12/24V DC
Rated charge current: 40A
Max Input Power: 520W(12V System) | 1040W(24V System)
Max.PV open circuit voltage: 150V | 138V (at 25℃)
Battery type: Sealed, Gel, Flooded and User
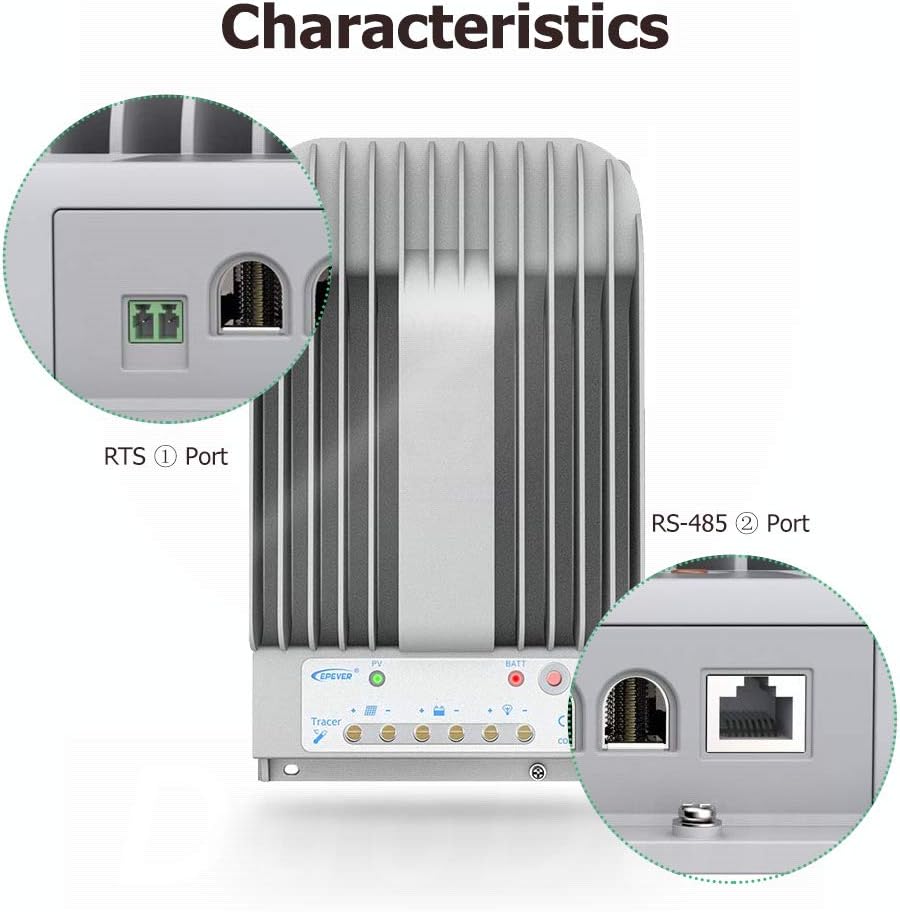
Communication: RS485(RJ45 interface)
Grounding: Common negative
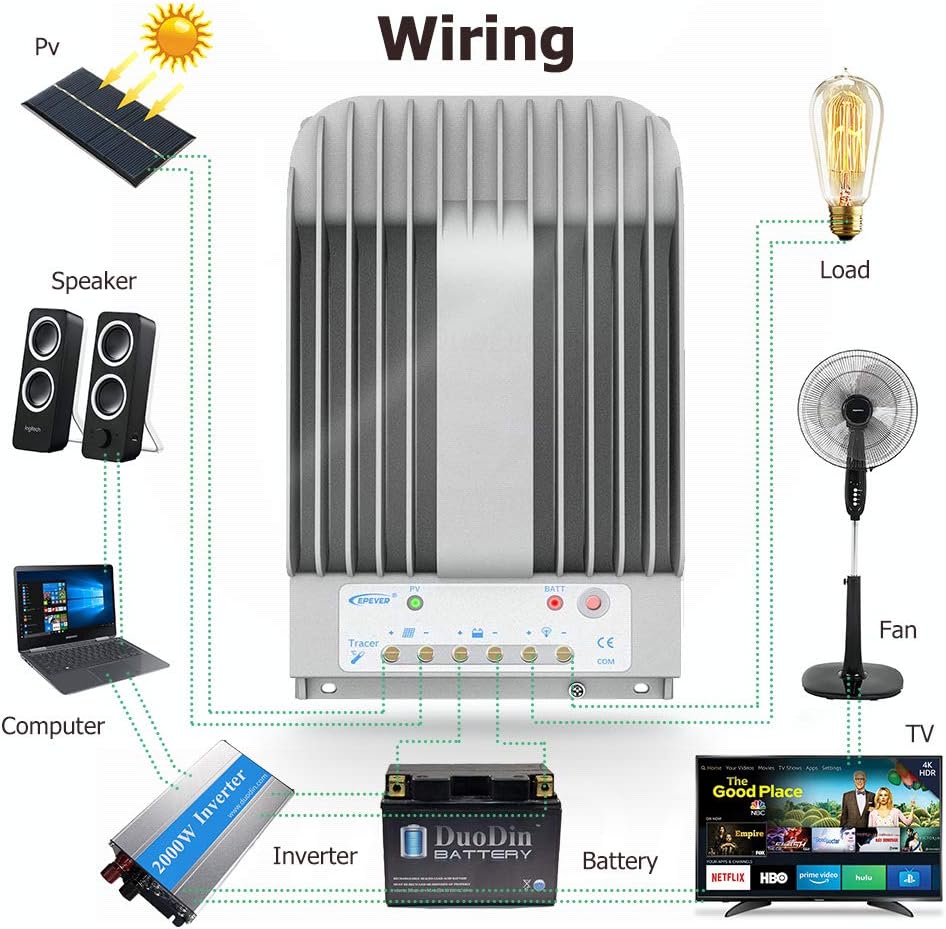
- 1)Connect components to the charge controller in the sequence as shownabove and pay much attention to the "+" and "-". Please don't turn onthe fuse during the installation. When disconnecting the system, theorder will be reserved.
- 2)After installation, power the controller and check the battery indicatoron the controller, it will be green. Always connect the battery first,in order to allow the controller to recognize the system voltage.
- 3) The battery fuse should be installed as close to the battery as possible. The suggested distance is within 150mm.
- 4)The Tracer-BN series is a negative ground controller. Any negativeconnection of solar, load or battery can be earth grounded as required.
- CAUTION: Unplug the RTS, the temperature of battery will be set to a fixed value 25℃.
- CAUTION: Please connect the inverter to the battery rather than to the controller, if the inverter is necessary.
- CAUTION:The RS-485 port and RTS port is not SELV circuit, it must haveisolation between the port and the place where the end user can accessdirectly.
- Package List:
- 1 x Solar Charge Controller
- 1 x User Manual
- 1 x MT52
- 1 x RTS
- 1 x RS485
You can directly contact SolaMr to select for you.
The control you will purchase must meet two conditions
1. The rated current of the controller must be greater than (the power of the solar panel divided by the voltage of the battery)
2. The open circuit voltage of the controller must be greater than the open circuit voltage of your solar panel, and both must be greater than the voltage of your battery
MPPT Solar Charge Controller:
How to choose a solar controller with the appropriate specifications?
-
Customer ReviewsNo comments