Top search terms
Home
/
Vertical Axis Wind Turbine Kit 400W 12V/24V- 3 Blade Portable Vertical Helix Wind Power Turbine Generator Kit with Charge Controller, Nature Power System for Marine RV Home Industrial Energy


Vertical Axis Wind Turbine Kit 400W 12V/24V- 3 Blade Portable Vertical Helix Wind Power Turbine Generator Kit with Charge Controller, Nature Power System for Marine RV Home Industrial Energy
【 HIGH-QUALITY BLADES 】The blade material is synthetically injection molded with high-strength FRP material. At the same time, the fashionable spiral blade is also designed with aerodynamics to make the rotor run smoothly, reliably and quietly. Coreless PMG provides lower start torque/wind speed and
Quantity
-
Detail
Specification:
Controller System: Electromagnetism
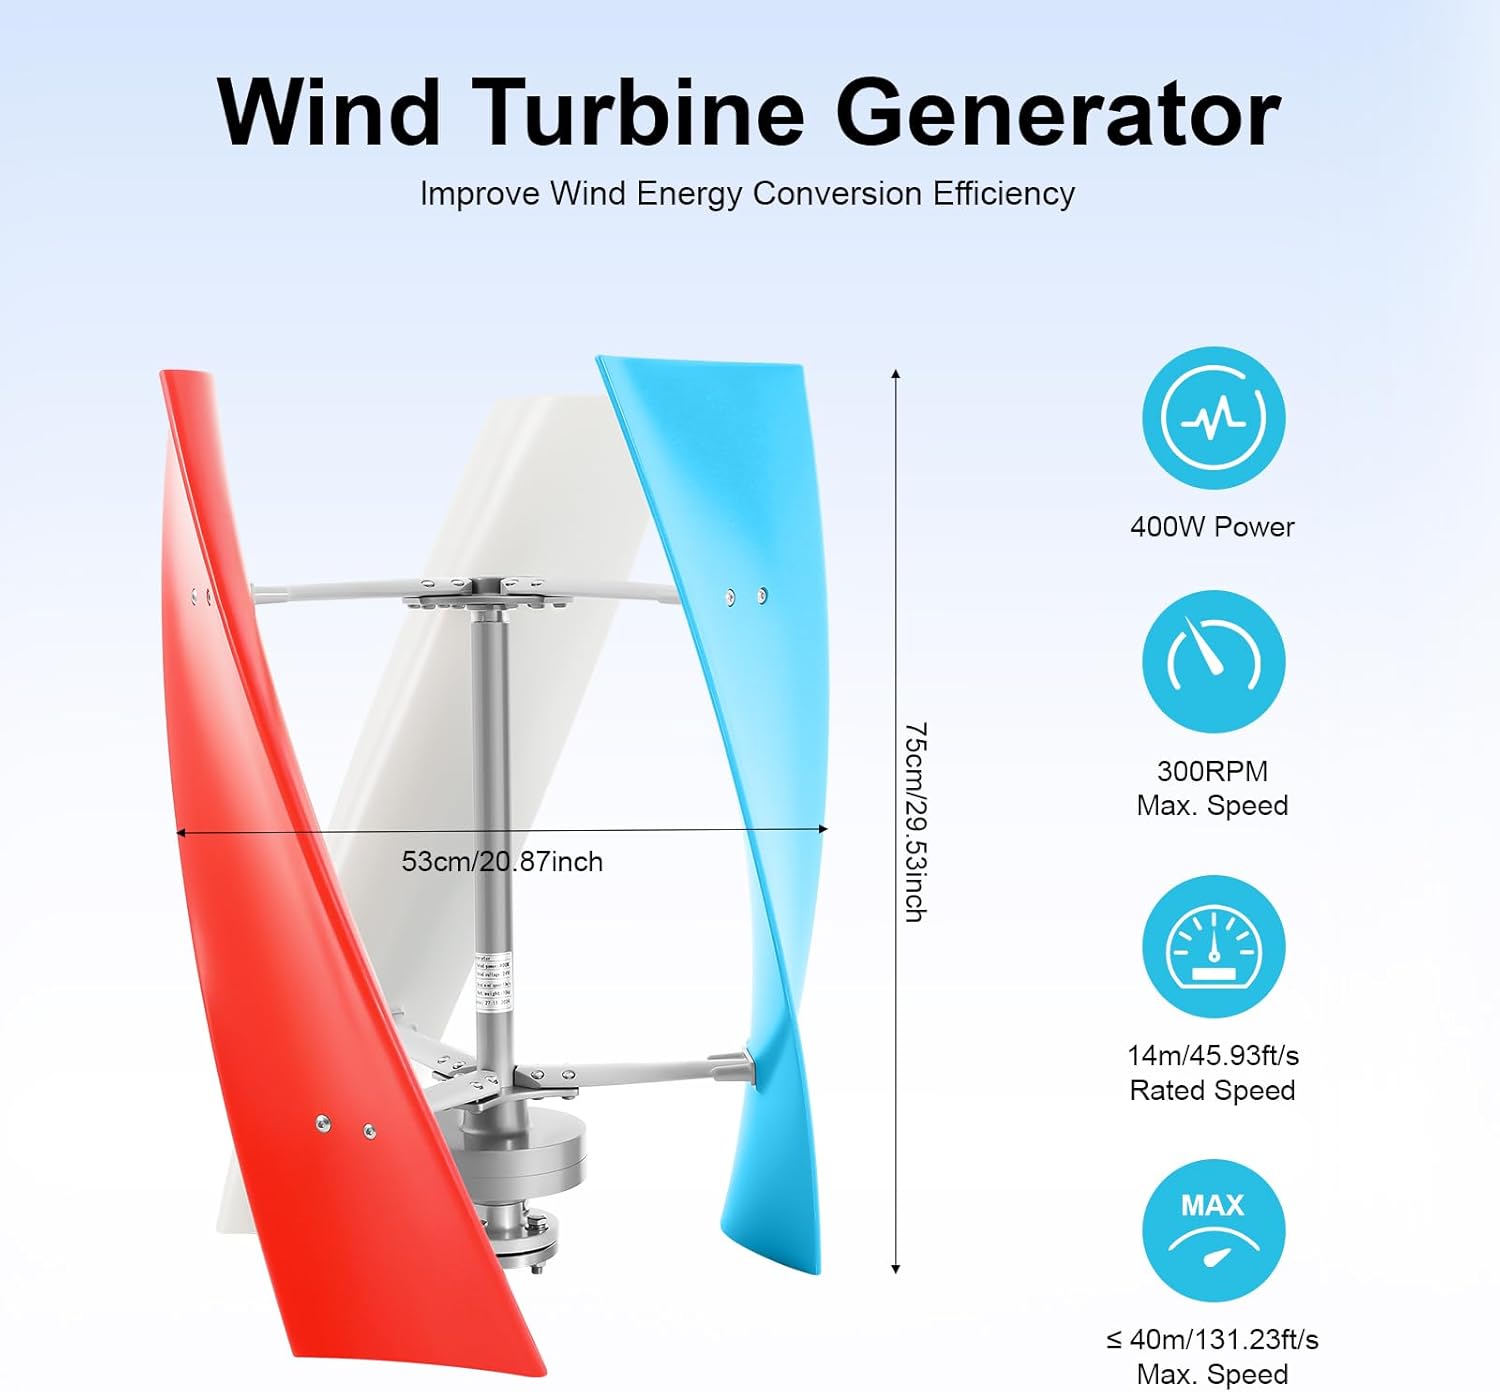
Starting Wind Speed: 1.3m(12inch)/s
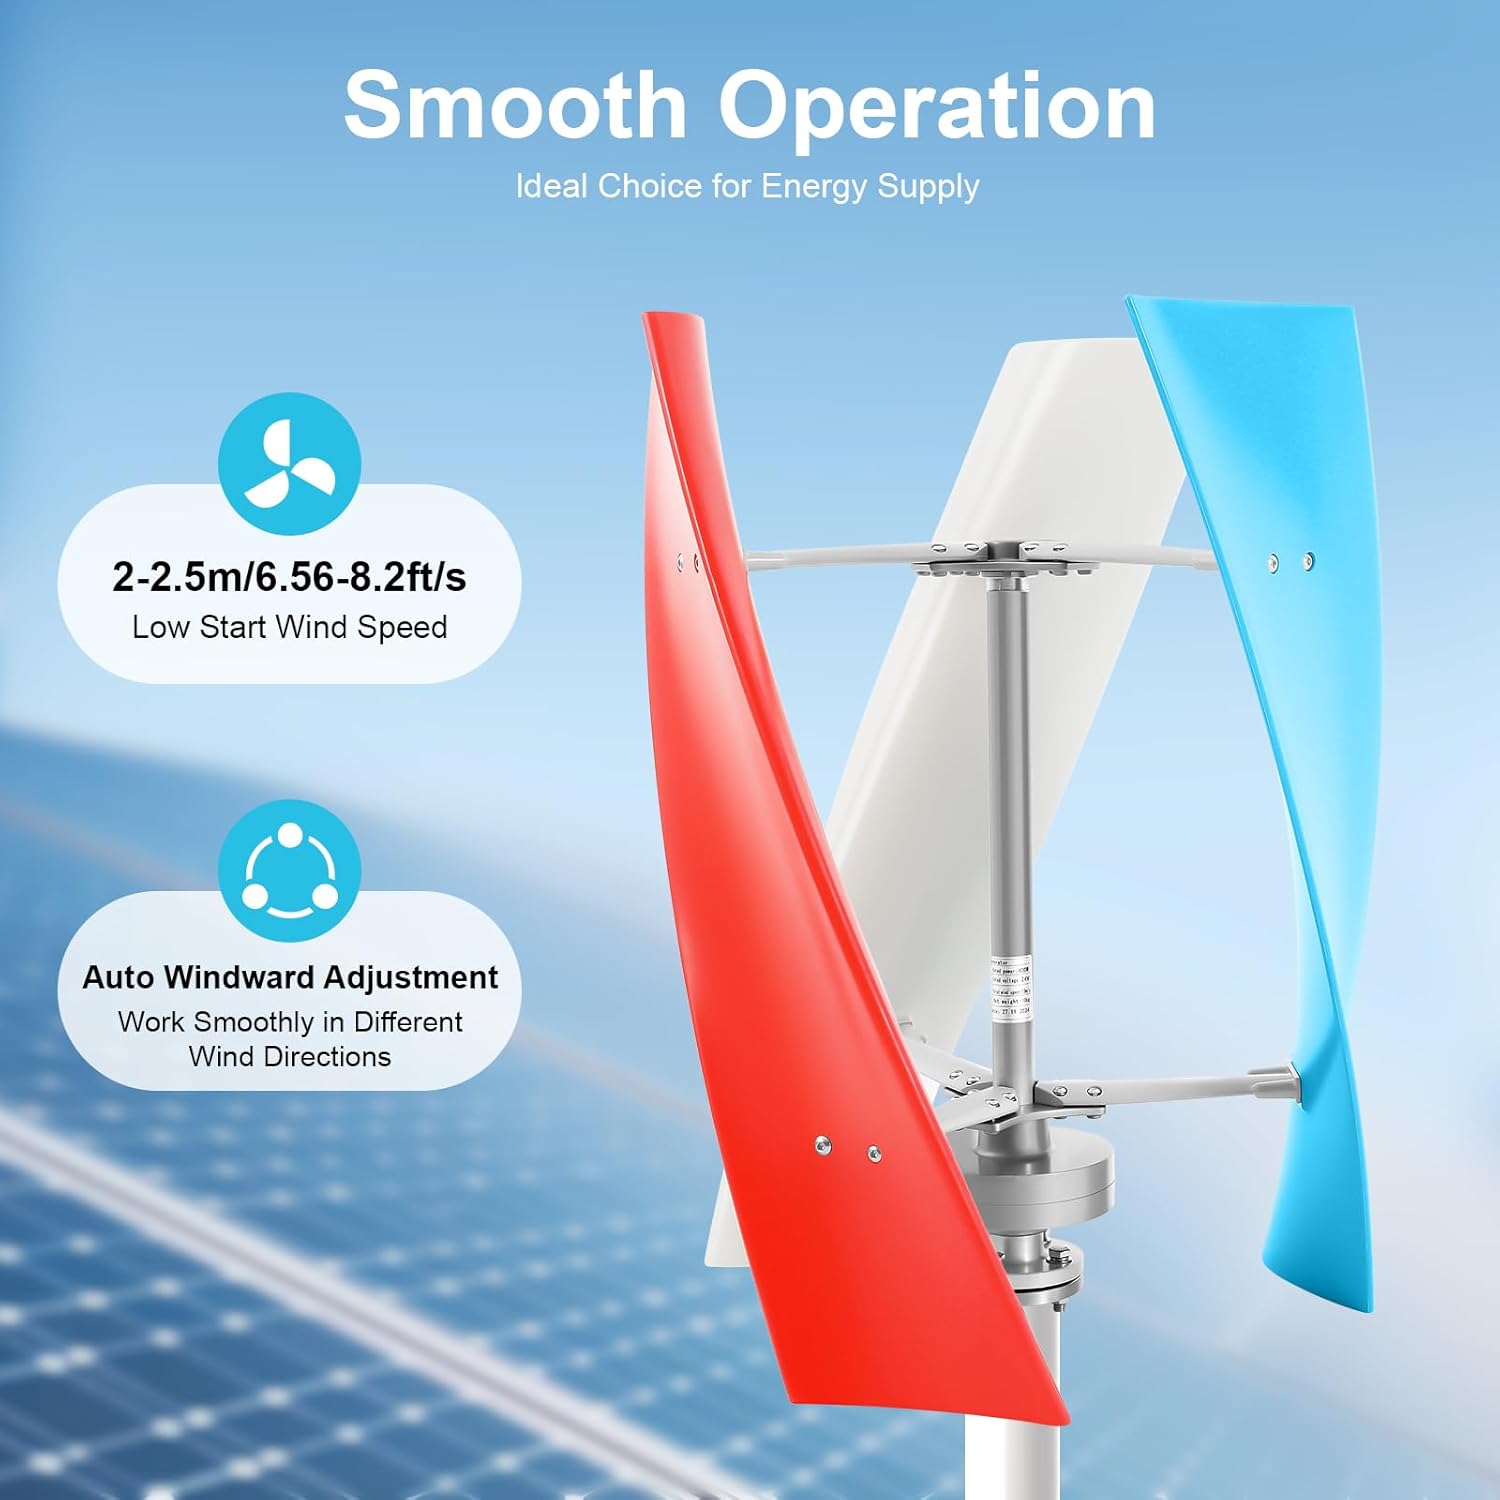
Cut-in Wind Speed: 2.0-2.5 m/s
Rated Wind Speed: 14m/s
The Instantaneous Maximum Wind Speed: ≤45m(1772inch)/s
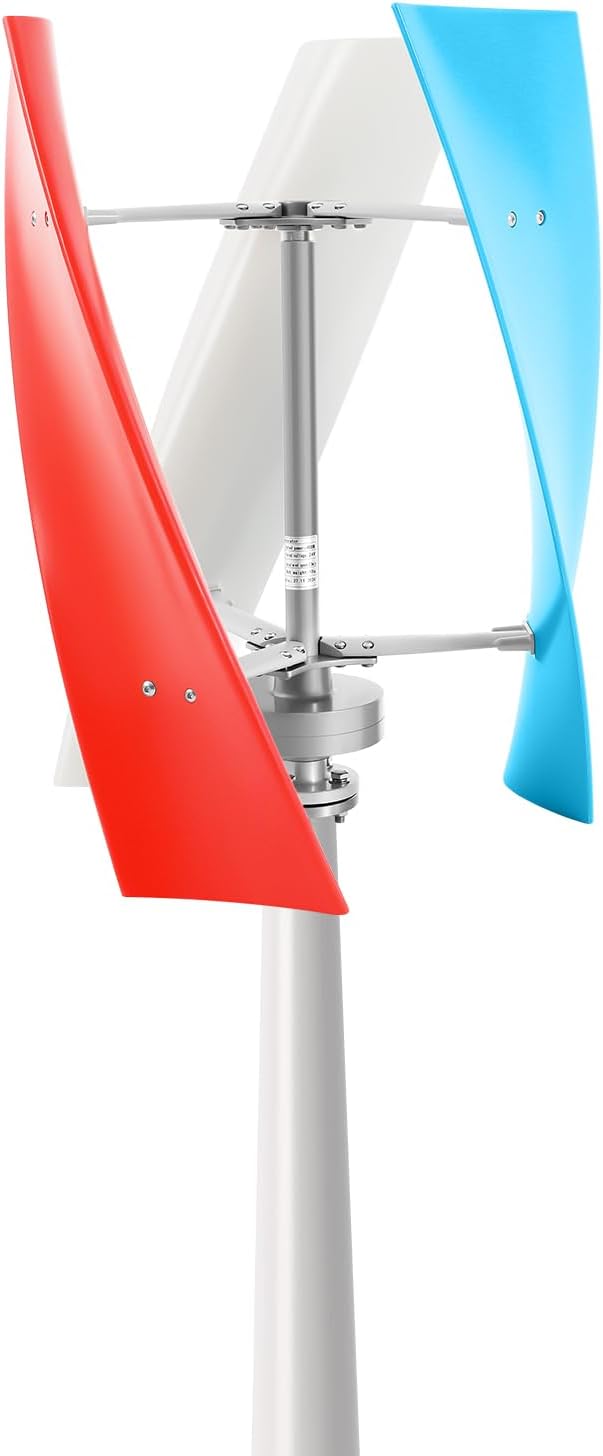
Blades Quantity: 3 (with Different Colors)
Diameter of Blades: 0.6m/24inch
Blades Height: 0.8m/31inch
Speed Regulation: Automatic
Rated Power: 400W
Max Power: 450W
Generator Protection Grade: IP67
Work Environment Temperature: 25 to 45℃+
Product Assembly Weight: <10kg/22lbs
Over-speed Protection: Electromagnetic Brake
Blade Material: Nylon Fiber
Generator: Maglev Generator
Service Life: 10-15 Years
Installation Instructions: Not Included
Rated Voltage: 24V
Package Included
1 x Wind Turbine
1 x Controller
3 x Blades (White, Red, Blue)
1 x Bag of Screws to Connect the Main Body
1 x Bag of Screws for Connecting the Bracket Blades
Other Accessory for Assembly
note:The wind speed needs to reach 18m/s for the machine to generate electricity properly.
note:The wind speed needs to reach 18m/s for the machine to generate electricity properly.
Notes
- There are two different kinds of screws. Please confirm the correct position of the screws before installation.
- The upper cover plate of the wind turbine does not need to be tightened, and the blades can be properly adjusted upward or downward during installation.
- When you place the wind turbine vertically, please prevent the bottom flange from crushing the output wire.
Installation
1. Check all the parts of the wind turbine, which includes 6 brackets and 3 blades in total.
2. Place the wind turbine vertically.
3. Connect brackets with blades by the bolt. Load the upper cover plate and lower cover plate.
4. Fix the bolt in the mounting hole (at the end of the bracket) from the outside of the wind blade.
5. Tighten all the bolts of blades and brackets, and toggle the blades. It should not have abnormal noise or jamming. Tighten the nut (under the upper cover plate of the wind turbine) to make the upper cover plate tightly fixed.
6. Align the flange hole of the wind turbine with the flange hole on the tower pole, put on flat washers and spring washers, and tighten the nut.
7. Professional installation is highly recommended if you have no previous installation experience.
8. You can watch the attached installation video as a reference.
9. If you have any problems, please feel free to contact us. We will reply and solve the problem for you as soon as possible.
-
Customer ReviewsNo comments